FOR ALL AGES
Earth Day is just around the corner on the 22nd of April and this year will be its 50th anniversary! This is a great opportunity to teach your family about the importance of caring for the environment and how we can all do our bit to help reduce pollution, fight climate change and look after our planet together. If you are homeschooling you could make Earth Day your theme, watch videos to learn more, check out the Earth Day website- they will be creating content for 24 hours straight to provide a totally digital Earth Day this year! Art is a wonderful way to celebrate the Earth, and a great way to open up the conversation around Climate Action, which is the theme of this year's Earth Day. We have listed below 8 brilliant Earth Day art projects for kids, they are all super easy and use recycled materials, and household/store cupboard items. All of the below projects would make wonderful gifts so why not pop a couple in the post and spread the word about Earth Day!
For a simple way to create some mixed media Earth Day art, we recommend clearing off the whole table and laying out all the art supplies you have, using what you already have available instead of buying new is also very eco! Cut out a few cardboard circles in all different sizes, some in paper too and let the kids go wild with creativity. It might be helpful to show them some photos of the Earth for some inspiration and rough location of ice caps and continents, but abstract is good! Put all of the creations up on the wall for an Earth Day art show.
To make these Earth pom poms you will need, blue and green carrier bags, cardboard, and some scissors. If you don't have a stash of carrier bags already, definitely don't get any specially! We are using the same method as these yarn pom-poms so these would look just as good made with scraps of yarn or even strips of fabric if you have some old tea towels, or bedsheets, using recycled materials for as many of these projects as possible is key.
The ultimate way to give back to the Earth through art, you will need green and blue sugar paper, water, and flower seeds of your choice. Take a look at this to see what we are going for here. So tear up the sugar paper and mix it with water, add a little bit at a time until you can squish it into a pulp, you can also use a hand mixer here! Then mix in your seeds. You can then press out quite a bit of the water, but keep it a little bit squidgy so you can shape it into little circular earth shapes. These can be planted whole in the garden or torn up and scattered outside. These make wonderful thoughtful Earth Day gifts.
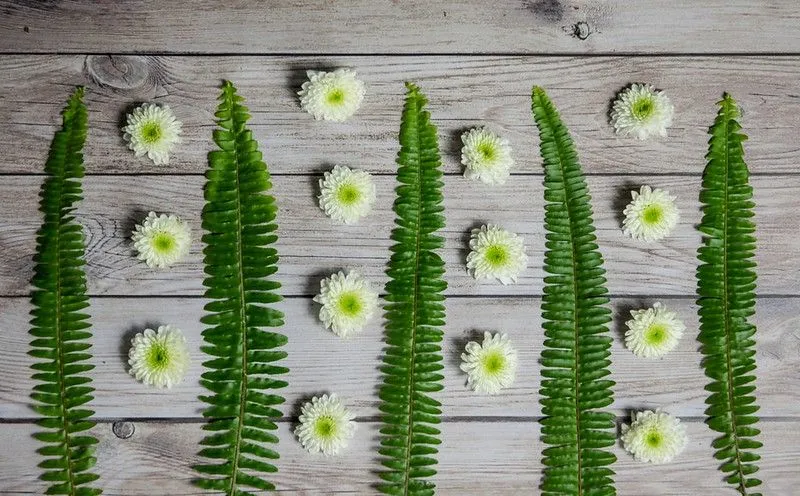
Next time you are in the garden or out and about on a walk, encourage the kids to look for things they can add to a nature-inspired earth collage! Things like green leaves and small rocks for the land, and perhaps some white petals for the ice caps. Sticks and flowers are great too! When you get home, cut a circle out of cardboard, thicker cardboard is best, then paint the whole thing blue. You can then look through your nature treasure and see what will work best, once the paint is dry the kids can lay out all the pieces and try different combinations. Once they are happy it can all be stuck down. You could draw on the actual continents in pencil and glue everything on to fit the shapes, this would work best on a big circle! Or keep it simple, an imperfect nature Earth will look lovely.
This is a really cool take on salt dough. Salt dough is super easy, and for this one we are adding coffee grounds which not only adds to the earthy look but makes this even more of a fun sensory activity. You will need, 1 cup plain flour, 1/2 cup of salt, 2 scoops of coffee grounds and 1/2 cup of water. You then mix up the dough and roll it out, you can use circular cookie cutters or a glass will also do the trick to get the circular shape. You could place leaves and flowers into the dough at this point to create some marks! If you want to hang these as decorations don't forget to make a small hole near the top. You then simply place in the oven on a very low heat, if you make your Earths more on the slim side they should only take an hour or two to dry out, check out this post by Rainy Day Mum for some mega salt dough tips. Once the disks have cooled down you can paint them! These will look beautiful hung up at the window on Earth Day.
This is such a clever way to use up broken crayons, these look amazing as Earth art themselves but you can also use them to create more Earth art- full circle! Making the crayons is best to do with older kids, and have the activity for younger ones be the drawing with them after as you will need to use an oven and the wax is hot and melted when it comes out! It is a good idea to save any broken crayons in a designated space, as this is a great way to reuse them to make mixed up rainbow crayons at any time, not just earth day! So you simply place snapped up blue and green crayons into a cupcake tin, if you have some white crayons they make good ice caps so pop those in first, then put the tray in the oven at a low temperature for around 15-20 minutes, until the crayons are melted. When you take the tray out, be careful not to mix the colours- also they liquid wax will be super hot! Leave somewhere cool to harden up then if you have space for the whole tray- put it in the freezer for an hour, the wax will pop right out! Take a look here for full instructions and step by step images.
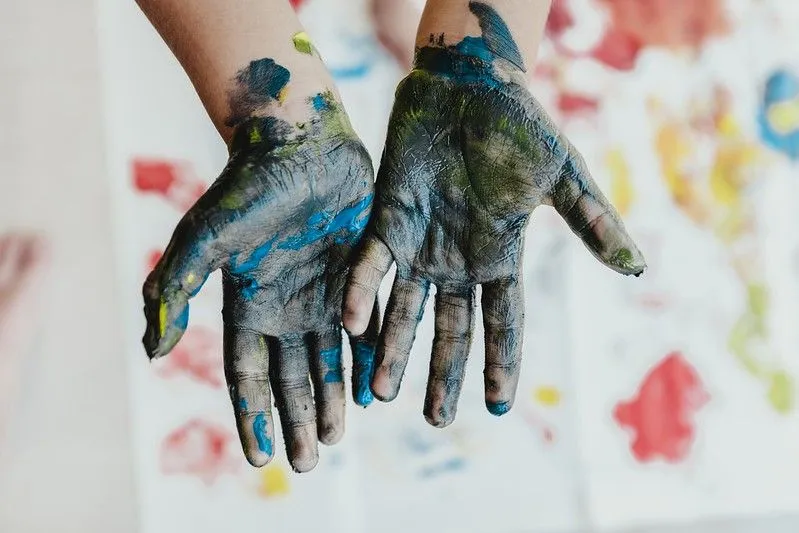
This is such a cute and fun way to make some little earth prints! You could cover a whole sheet and make a repeat pattern, or experiment with rolling the balloon around to see what you can come up with, anything goes. You simply need a balloon, card or paper, and green and blue paint. Blow up your balloon, for little hands especially don't blow it up all the way, its much easier to hold onto and dip in the paint if you keep it on the small side, for bigger 'stamps' you can blow it up more but be on hand to catch it! Gently swirl the blue and green paint together, then simply dip the balloon in the paint and stamp it on to the card! Take a look at this post for full instructions. To add an eco-friendly touch, you could swap out the balloon for a ball that you can wash the paint off afterwards!
Making marble art is so fun and really satisfying, with a lovely end result- you may find yourself having a go at this minus the kids! Full instructions can be found here, but this could not be easier! It is also just messy enough that the kids will love it, you can get creative swirling your green and blue paint or food colouring into the shaving foam. If you have a dropper this can be an amazing sensory play activity too, fill the droppers with food colouring and let the kids drip it onto the shaving foam and swirl it around with their hands. Once you have made your marbled paper or card, let it dry then simply cut out circles and you have a beautiful, abstract Earth- you could make multiple circles then string them up together to make a mobile or some bunting. Bonus points for using recycled card and paper!
Read The Disclaimer
At Kidadl we pride ourselves on offering families original ideas to make the most of time spent together at home or out and about, wherever you are in the world. We strive to recommend the very best things that are suggested by our community and are things we would do ourselves - our aim is to be the trusted friend to parents.
We try our very best, but cannot guarantee perfection. We will always aim to give you accurate information at the date of publication - however, information does change, so it’s important you do your own research, double-check and make the decision that is right for your family.
Kidadl provides inspiration to entertain and educate your children. We recognise that not all activities and ideas are appropriate and suitable for all children and families or in all circumstances. Our recommended activities are based on age but these are a guide. We recommend that these ideas are used as inspiration, that ideas are undertaken with appropriate adult supervision, and that each adult uses their own discretion and knowledge of their children to consider the safety and suitability.
Kidadl cannot accept liability for the execution of these ideas, and parental supervision is advised at all times, as safety is paramount. Anyone using the information provided by Kidadl does so at their own risk and we can not accept liability if things go wrong.
Kidadl is independent and to make our service free to you the reader we are supported by advertising.
We hope you love our recommendations for products and services! What we suggest is selected independently by the Kidadl team. If you purchase using the buy now button we may earn a small commission. This does not influence our choices. Please note: prices are correct and items are available at the time the article was published.
Kidadl has a number of affiliate partners that we work with including Amazon. Please note that Kidadl is a participant in the Amazon Services LLC Associates Program, an affiliate advertising program designed to provide a means for sites to earn advertising fees by advertising and linking to amazon.
We also link to other websites, but are not responsible for their content.
Was this article helpful?
Browse Category


We’ll send you tons of inspiration to help you find a hidden gem in your local area or plan a big day out.



Check your inbox for your latest news from us. You have subscribed to:
Remember that you can always manage your preferences or unsubscribe through the link at the foot of each newsletter.