Arts & Crafts
Learn more
Reading & Writing
Learn more
Math & Logic
Learn more
Sports & Active
Learn more
Music & Dance
Learn more
Social & Community
Learn more
Mindful & Reflective
Learn more
Outdoor & Nature
Learn more
FOR ALL AGES
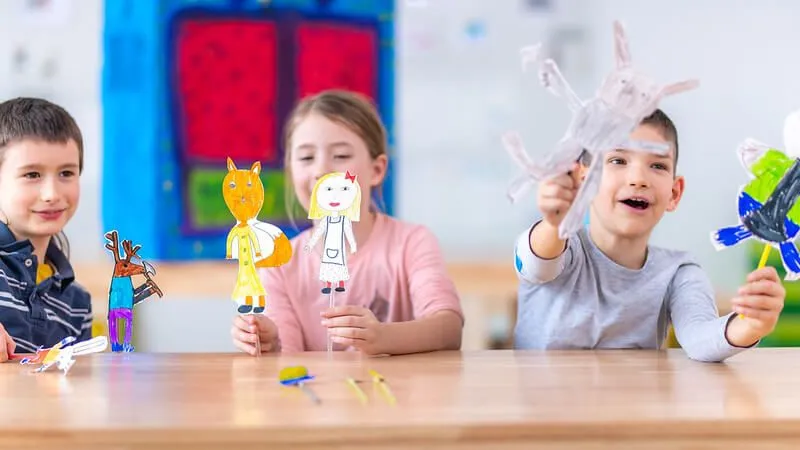
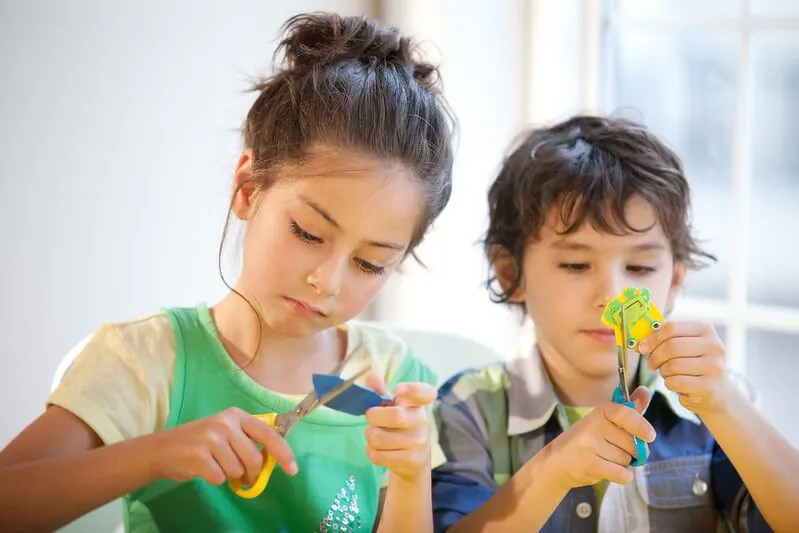
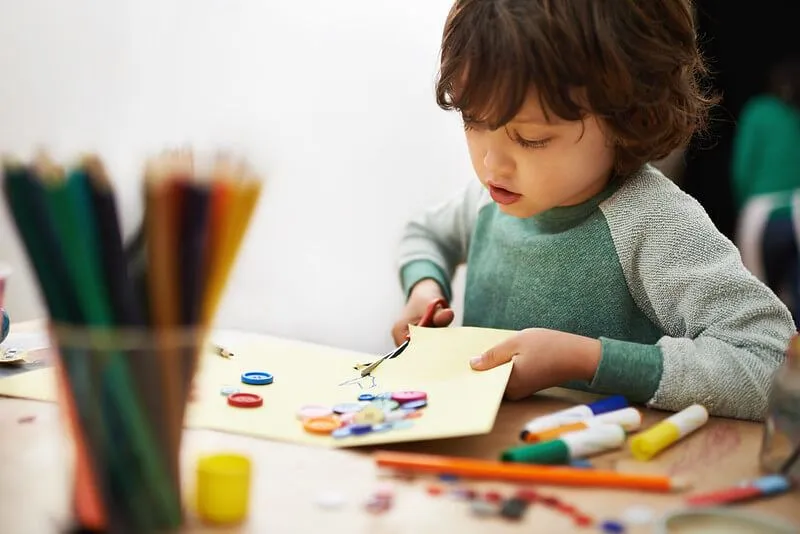
The best arts and crafts often use the simplest materials - and split pins are a perfect example.
Make puppets, paper characters, shadow puppets and Jumping Jacks using just paper and some split pins. Follow our list of split pin craft ideas - or use the list as inspiration, and come up with your own DIY designs for puppets, dolls and other split pin crafts and activities.
Follow this brilliant video tutorial from Alexa Van Maanen, as she explains the basic technique behind making articulated paper puppets - using any design you wish!
A brilliant way to help kids learn to tell the time, why not craft a clock from paper - complete with moving hands - to practice telling the time with?
What You'll Need:
Paper plate, or a circle of card
Two paper arrows - one large, one small
Pens
Split pins
Scissors
Instructions:
Using the pens, add the numbers around the edge of the clock face. Construct the clock using the split pins to attach the two hands to the centre of the clock face, and then challenge your young ones to tell the time... You could also have fun decorating this homemade clock, so get creative with your craft supplies, and see what you can make.
Delight kids with this old-fashioned Jumping Jack toy. Simply hold the character by his hat, and pull the string to make Jack jump up and down. Create your own character, or use the traditional design of a template from the V&A Museum in London.
What You'll Need:
Printer
Card
Glue
Scissors
Split Pins
Colouring pens/pencils
Blu-tac
String
Instructions:
Print the template, before glueing it onto a sheet of card. Using pens or pencils, colour in the pieces and then cut them out. Make holes in the template at the marked points, using a sharp pencil - with a blob of blu-tac behind. Attach the two arms together using a short length of string, and then the two legs, before using the split pins to assemble the Jumping Jack. Once assembled, attach a single, long piece of string that connects the arms and legs - then pull the string and watch the Jumping Jack's arms and legs dance.
Use the same technique as above to create a Jumping Jack figure of The Gruffalo. If you don't have a printer, you could always trace around a character from your kids favourite book, or make your own DIY Jumping Jack by drawing a new character.
What You'll Need:
Printer
Card
Glue
Scissors
Split Pins
Colouring pens/pencils
Blu-tac
String
Life-cycle spinning wheels are a great way to explain how different animals, plants and processes change over time. This craft activity uses simple materials to explain complicated scientific processes, and the concept of a life-cycle - and it can be adapted to suit your child's interests or age range. Follow the instructions below to make a butterfly life-cycle wheel, but remember that you can make a life-cycle wheel for almost anything that has a life cycle, including animals, plants and even how day turns into night.
What You'll Need:
2 circles of card or cardboard - one smaller than the other
Scissors
Split pins
Colouring pencils and pens
Instructions:
On the large circle, draw the various stages of the life cycle in a circular shape. For a butterfly, this would be from egg to Caterpillar, to chrysalis, to butterfly; for a plant, this could be from seed to germination, to roots, to leaves; for a ladybird, it would be from eggs to larvae, to pupa, to a young ladybird, to the red-and-black spotted adult ladybird.
Cut a window into your the smaller circle - in a wedge or fan shape - making sure this window is big enough to reveal one drawing at a time on the larger circle beneath it. Don't cut into the centre of the smaller circle, as this is where the split pin will go. Make a hole in the centre of the two-card circles, and attach them together using a split pin, then turn the top circle to reveal each stage of the cycle.
What You'll Need:
Instructions:
Cut the paper plate into quarters - two of these will become the bird's wings. Cut a 'body' from the piece of card - this can be any shape or design you like, though for a basic 'bird' shape, draw a bowling pin or a simple fish shape. Mark where the holes should go on the body, then make marks that correspond with these on the wings.
Make the bird unique by painting and decorating the body and wings - you can get really creative here, using all your favourite art and craft techniques, like potato stamps or marbling. Search for pictures of amazing, exotic birds, and use the photos as inspiration - or let the kids go wild, and see what they create.
Once dry, cut out the bird shape, and punch holes in the body and wings (using a sharp pencil and blu-tac, or a hole punch) - making two extra holes, in the pointed corner of each wing. Assemble the bird with the split pins, keeping them loose so that the wings can still move. On the back of the bird, knot string between the wings, (through the two extra holes that you made), then take a longer piece of string, and tie it on to the middle of the short string.
Tape a loop of string to the back of the bird's head, and then pull the long, dangling string to make the birds beautiful wings flap.
What You'll Need:
Printer
Scissors
Split pins
Colouring pens and pencils
Instructions:
Choose and print your template - use the blank template if your child wants to colour in the character themselves, or print the full-colour template if you want to quickly cut and assemble the character. Cut out the individual pieces, and following the markings on the template, push the split pins through the paper to connect the pieces into a moving toy. There are lots of animals and characters to choose from - including a turtle, a cow, a kangaroo, a robot, a royal guard and plenty of others, so there's something for everyone.
If you liked the DIY craft ideas in this article, we've got plenty more where that came from! Take a look at how to make DIY musical instruments and fantastic DIY chore charts.

Godmother to two little girls, Rosanna enjoys finding ways to entertain her goddaughters with games, cooking and – best of all - arts and crafts. Having studied Fine Art, Rosanna uses her creativity to make colourful, fun and educational art and craft projects that are perfect for kids of all ages. Full of ideas for homemade cards and handcrafted gifts, toys and decorations – Rosanna also has a knack for finding child-friendly cultural activities and fun places for kids to blow off steam.
Read The Disclaimer
At Kidadl we pride ourselves on offering families original ideas to make the most of time spent together at home or out and about, wherever you are in the world. We strive to recommend the very best things that are suggested by our community and are things we would do ourselves - our aim is to be the trusted friend to parents.
We try our very best, but cannot guarantee perfection. We will always aim to give you accurate information at the date of publication - however, information does change, so it’s important you do your own research, double-check and make the decision that is right for your family.
Kidadl provides inspiration to entertain and educate your children. We recognise that not all activities and ideas are appropriate and suitable for all children and families or in all circumstances. Our recommended activities are based on age but these are a guide. We recommend that these ideas are used as inspiration, that ideas are undertaken with appropriate adult supervision, and that each adult uses their own discretion and knowledge of their children to consider the safety and suitability.
Kidadl cannot accept liability for the execution of these ideas, and parental supervision is advised at all times, as safety is paramount. Anyone using the information provided by Kidadl does so at their own risk and we can not accept liability if things go wrong.
Kidadl is independent and to make our service free to you the reader we are supported by advertising.
We hope you love our recommendations for products and services! What we suggest is selected independently by the Kidadl team. If you purchase using the buy now button we may earn a small commission. This does not influence our choices. Please note: prices are correct and items are available at the time the article was published.
Kidadl has a number of affiliate partners that we work with including Amazon. Please note that Kidadl is a participant in the Amazon Services LLC Associates Program, an affiliate advertising program designed to provide a means for sites to earn advertising fees by advertising and linking to amazon.
We also link to other websites, but are not responsible for their content.
Was this article helpful?
Get inspiration for education!
Subscribe for virtual tools, STEM-inspired play, creative tips and more

Browse Category
·
September 06, 2021


We’ll send you tons of inspiration to help you find a hidden gem in your local area or plan a big day out.


Check your inbox for your latest news from us. You have subscribed to:
Remember that you can always manage your preferences or unsubscribe through the link at the foot of each newsletter.