FOR ALL AGES
Image © Pexels, under creative commons licence.
Balloons are a huge part of parties, and parties equal fun!
Not only do balloons make fabulous decorations but our squeaky friends can be twisted and turned to make a new sculpture, also known as the art of modelling balloons. You may think that only clowns, magicians, and entertainers can model balloons but it is actually quite simple and you can do it too.
If you and your child want to impress at your next party, check out our easy balloon modelling instructions. We have the steps to creating dog, monkey and butterfly balloon animals, plus some tips to get you started.
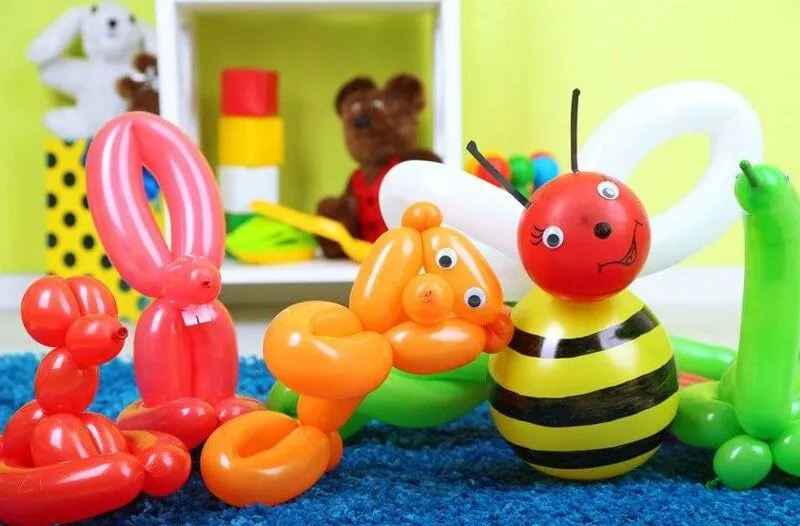
For the best outcome for your balloon animals, get your hands on high-quality balloons for twisting because regular long balloons may burst. Most balloon animals need size 260 balloons which are 2 inches in diameter and 60 inches long when inflated. To help out your lungs, it is worthwhile getting a hand pump to inflate balloons.
Twisting balloons and how to tie balloons are key to creating balloon animals. Here are some tips on balloon twisting before you assemble your balloon animals.
A Basic Twist: Hold one end of the balloon with your non-dominant hand. Grab the area you need to twist with your dominant hand and twist. Ensure you keep hold of the balloon so the twist doesn't unwind.
A Lock Twist: This is necessary for making the body parts of your balloon animal models because it holds the twists in place. To make a lock twist, make two basic twists along the balloon creating four balloon segments. Then, bend the balloon back on itself, so that the bend is between the second and third segments. Take the two middle segments and twist them together at least three times to secure them.
A Fold Twist: Another essential balloon twist often used to create balloon animal ears. It is like a lock twist, but creates a loop. Fold the middle balloon segment in half and align the two twists. Twist them together to create a loop segment.
How To Tie A Balloon: Hold the end of the balloon between your thumb and two fingers. Stretch and wrap the end of the balloon around your two fingers and bring it through underneath to tie a knot.
Dog balloons are probably the most popular and easy balloon animals to create. Follow these instructions so that you can create a dog balloon animal:
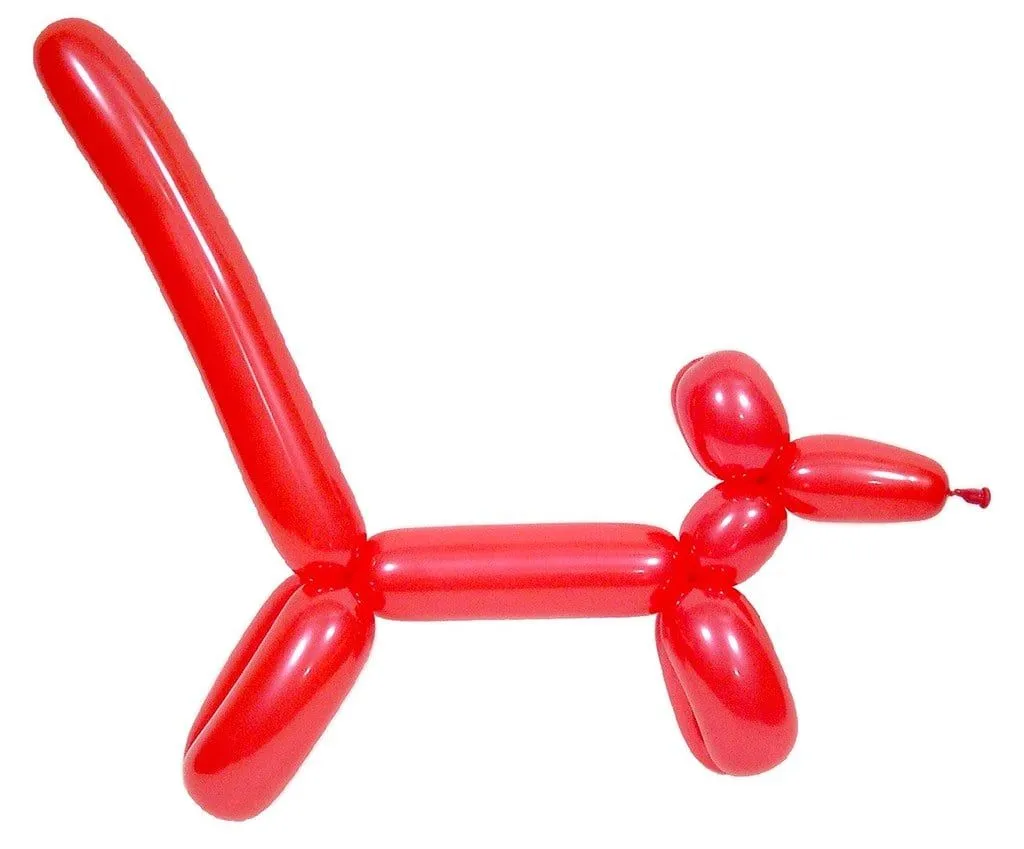
Image © Greg McMahan, under creative commons licence
1. Inflate your balloon about two inches from the tip. This will allow any expansion while you assemble. Then tie.
2. Make three basic twists, each an inch apart. The first segment from the knot is the dog's nose, and the next two segments are the dog's ears. The remainder of the balloon is the rest of the body.
3. Fold the third segment over the second and twist them together in a lock twist. You should now have a head for your dog balloon.
4. Make three more basic twists about two inches apart. The first segment is the dog's neck. The next two should be the same length and are the front legs. The remainder is the rest of the body.
5. Like in step two, fold over the third segment and twist the leg segments together with a lock twist. Now you should have some front legs.
6.Repeat the process with three basic twists again to make the back legs. Once all these steps are completed, you should have a beautiful dog balloon!
Ready to monkey around? Here are a set of instructions to create cheeky monkey balloons. The steps are pretty similar to making a dog balloon, so it should be a piece of cake.
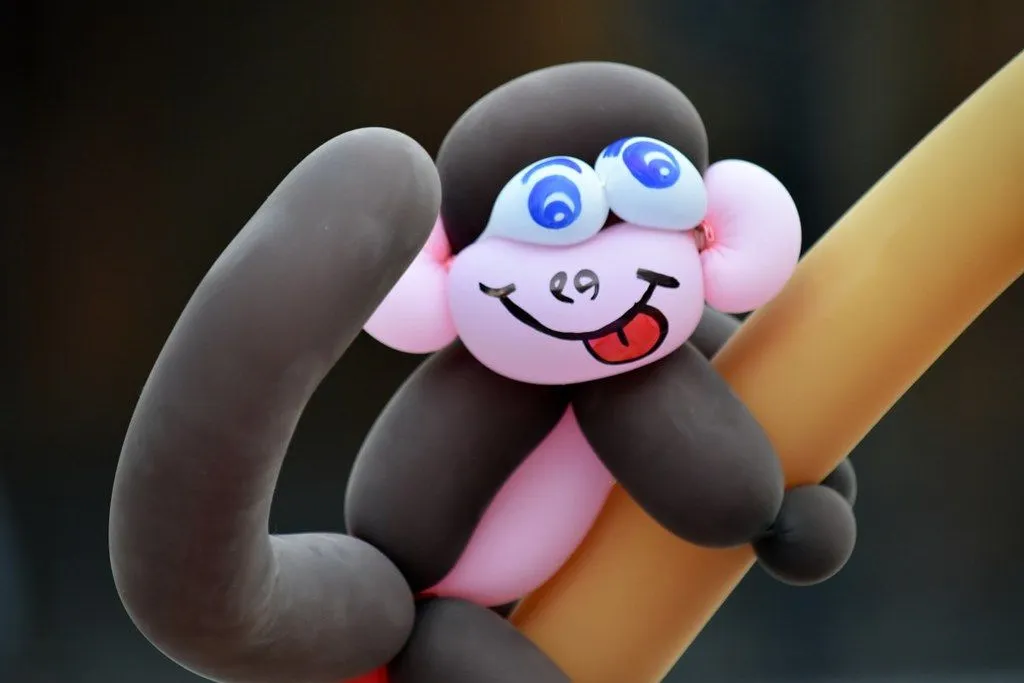
Image © Bicanski, under creative commons licence
1. Inflate the balloon leaving a few inches at the end, and tie.
2. Make a basic twist two inches from the knot. This segment is the monkey's face.
3. Make another basic twist close to the first one.
4. Using a fold twist, line up the second and first twists you made and twist them together two times. This is the ear.
5. Make another basic twist about an inch from the ear. This is the monkey's forehead. Make another basic twist after the forehead, followed by a fold twist, just like you did to make the first ear. Now you should have two ears.
6. Hold the two ears at their bases, bring them together and twist three times. The monkey head is complete.
7. To make the body make three more basic twists. Create the first basic twist a few inches from the head to create the monkey's neck. The next two basic twists should be the same distance apart. These will be the monkey's arms.
8. Fold the balloon at the twist joining the two arm segments and lock twist this together. This makes the monkey's upper body.
9. Make another basic twist a few inches after the first arms to make the monkey's body. Then, repeat the steps above to make the monkey's arms for the back legs, making sure to leave enough space at the end for the tail.
10. Make some final adjustments to the body and ensure the tail dangles down. Now, the monkey needs to climb a tree. Choose a balloon in a contrasting colour, inflate it fully, tie it up and slide it between the monkey's limbs. Ta da! Now you have a balloon animal perfect for cheeky kids.
A butterfly balloon is not only great fun to create, but makes a fluttering decoration for any birthday party.
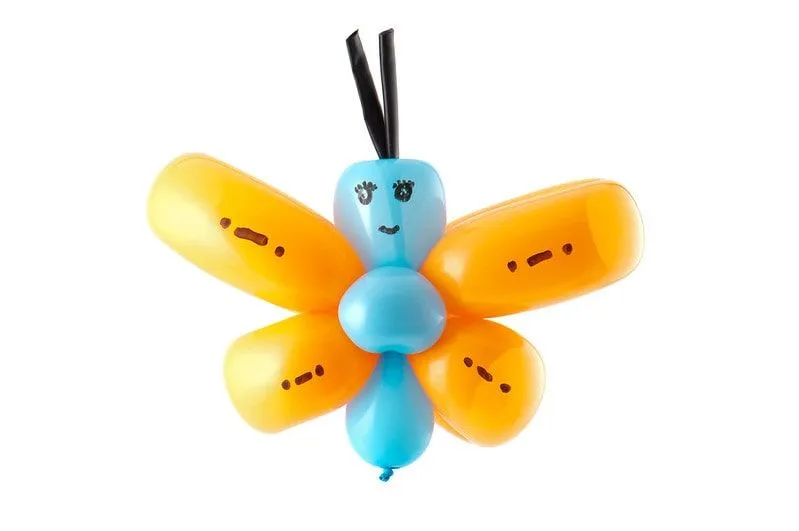
Image © Araden, under creative commons licence
1. Inflate a balloon, leaving some space at the end before tying.
2. Hold both ends of the balloon and bring them to meet. Tie the ends together to create a loop. Locate the middle of the loop opposite the knot and twist that point to form two segments.
3. At a point about a third of the way along the loop, grab the two segments and twist them together to create two smaller loops.
4. Fold the two small loops together so that the ends of your two loops meet and hold this point with one hand. Using your free hand, flatten the other end of the loops to meet the loops in your other hand.
5. Grab the centre of these four folds with one hand. Using the other hand, grab two of the loops and make a lock twist with the other two loops. Now you should have a pair of wings.
6. Take another balloon in a different colour and inflate it only in the middle about five fingers wide. Fold this in half to create a loop. Tie a knot at the top of the loop using the two ends of the balloon, creating the antennae.
7. On one side of the loop, create a bubble so one segment is a bit smaller than the other and use a lock twist to secure the small segment. This is the butterfly's head.
8. Connect the two parts together by wrapping the butterfly body around the wings and lock twisting the head and abdomen together. Just arrange the body and you can enjoy your butterfly balloon animal!
Read The Disclaimer
At Kidadl we pride ourselves on offering families original ideas to make the most of time spent together at home or out and about, wherever you are in the world. We strive to recommend the very best things that are suggested by our community and are things we would do ourselves - our aim is to be the trusted friend to parents.
We try our very best, but cannot guarantee perfection. We will always aim to give you accurate information at the date of publication - however, information does change, so it’s important you do your own research, double-check and make the decision that is right for your family.
Kidadl provides inspiration to entertain and educate your children. We recognise that not all activities and ideas are appropriate and suitable for all children and families or in all circumstances. Our recommended activities are based on age but these are a guide. We recommend that these ideas are used as inspiration, that ideas are undertaken with appropriate adult supervision, and that each adult uses their own discretion and knowledge of their children to consider the safety and suitability.
Kidadl cannot accept liability for the execution of these ideas, and parental supervision is advised at all times, as safety is paramount. Anyone using the information provided by Kidadl does so at their own risk and we can not accept liability if things go wrong.
Kidadl is independent and to make our service free to you the reader we are supported by advertising.
We hope you love our recommendations for products and services! What we suggest is selected independently by the Kidadl team. If you purchase using the buy now button we may earn a small commission. This does not influence our choices. Please note: prices are correct and items are available at the time the article was published.
Kidadl has a number of affiliate partners that we work with including Amazon. Please note that Kidadl is a participant in the Amazon Services LLC Associates Program, an affiliate advertising program designed to provide a means for sites to earn advertising fees by advertising and linking to amazon.
We also link to other websites, but are not responsible for their content.
Was this article helpful?

Browse Category


We’ll send you tons of inspiration to help you find a hidden gem in your local area or plan a big day out.


Check your inbox for your latest news from us. You have subscribed to:
Remember that you can always manage your preferences or unsubscribe through the link at the foot of each newsletter.