FOR ALL AGES
Header Image © iStock
Kids of all ages love playing with Lego, and here's an easy idea to craft your very own Lego candy machines that we know they'll adore.
This fun project combines two things kids go mad for: sweets and Lego. Best of all it's easy to craft your very own Lego candy dispenser by following our step-by-step instructions.
Just remember to tidy away after so you don't step on any stray pieces – ouch!
It sure beats yet another Lego train, city or house that's for sure, and the kids will love the thrill of pulling the arm to release their sweets. As building craft goes this candy machine should take around 30 minutes to put together but there's a lot of fun to be had along the way. Younger kids will love working with you on this simple design but why not challenge older kids to come up with some fun ideas on how they could customise it? How about stacking two on top of each other for a double hit of sweet treats? Good news: the Lego store has now reopened if you need to top up your collection to build this one.
As with all projects involving food and toys there are some considerations to make before you start. You may like to give your bricks a quick wash if your confectionery of choice is unwrapped. And also think about the size of each sweet – it needs to be able to fit down the ramp and through the door. The bigger the sweet the more ambitious your kids' project will need to be. On a separate note: why not impress Lego-mad kids with these top themed gags.
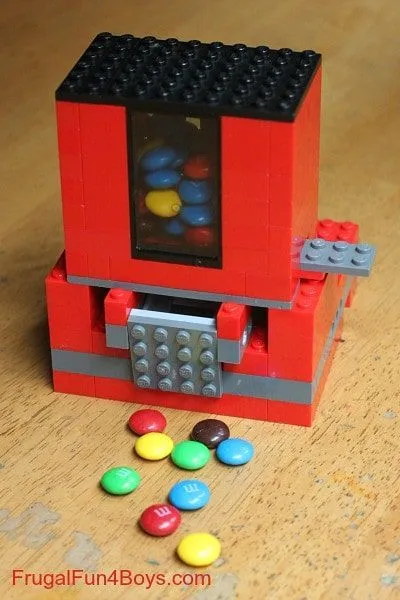
Image © Frugal Fun 4 Boys
Variety of Lego bricks.
Lego base plate.
Sweets.
Step one: Your base plate will be used for the bottom of your candy dispenser, so make sure to use one that's a good size – 12 X 12 is perfect for a small dispenser, but size up if you want a bigger one. Add rows of bricks along the outside edge of the base plate on the underneath side to give your Lego candy dispenser some extra height and make it more comfortable to use. One additional brick height should be plenty.
Step two: Using some flat Lego pieces you need to make a small slide for the candy to slip down. If you can't find the exact pieces shown in the picture below challenge your young engineers to create their own slide out of the pieces they already have. The red/black brick is used to prop up the slide when you fix it in place.

Image © Frugal Fun 4 Boys
Step three: Position your ramp on your base plate as is shown in the picture, with two 2 X 2 pieces either side of it. You'll need those to attach your door.
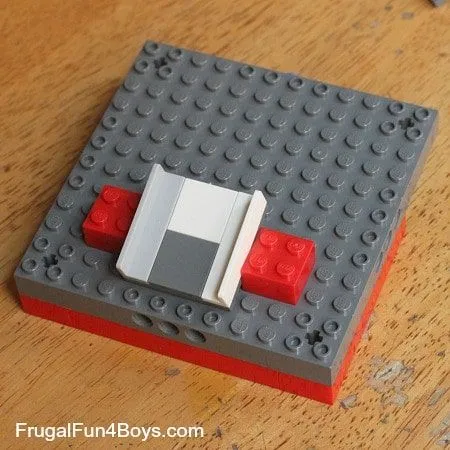
Image © Frugal Fun 4 Boys
Step four: Now make your door! You will need one Lego piece that can be used to hinge the door. If you don't have this get the kids to get their thinking hats on for how they can operate the door. Have a look below to see what you can use to build your door.
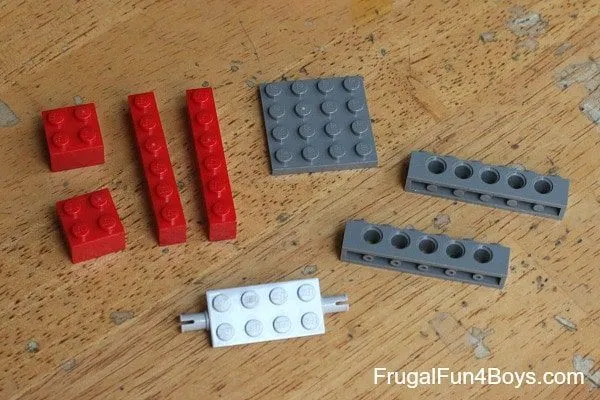
Image © Frugal Fun 4 Boys
Step five: Position your door on to the ramp, like this:
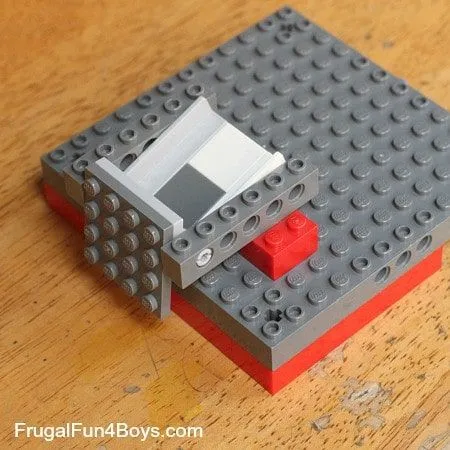
Image © Frugal Fun 4 Boys
Step six: Add bricks to your base plate to add another layer. You need to build up some areas around the door and ramp. Add two 2 X 6 pieces on either outside edge, with the door and ramp in the middle. Add 1 X 6 pieces over the same sized piece you used to attach the door. To join these, add two 2 X 6 pieces directly behind your ramp. Your build should look like this now:
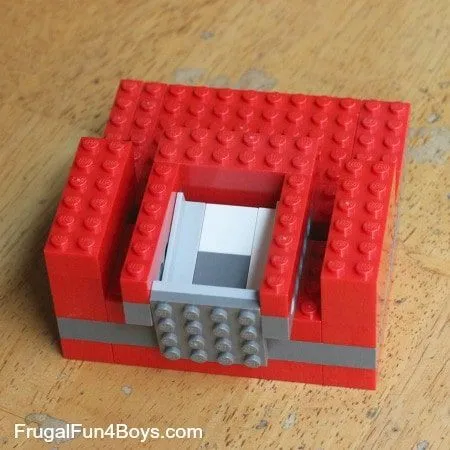
Image © Frugal Fun 4 Boys
Step seven: Bridge either side of the ramp using two 2 X 10 pieces and add a flat, smooth 2 X 2 piece (known as a tile, fact fans) between these bridges – one on each side. It's important these two squares have a smooth finish to enable the arm to slide easily and dispense your candy.
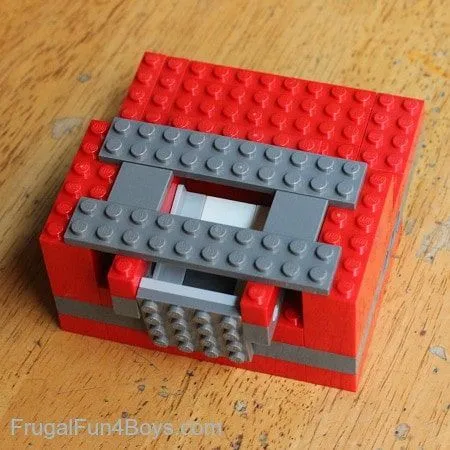
Image © Frugal Fun 4 Boys
Step eight: On the left side of your two bridges add a 1 X 6 piece to act as a stop. Then top a 2 X 10 flat piece with a 2 X 4 flat piece on the end. Slot it between the two bridges and check you can pull it in and out easily.
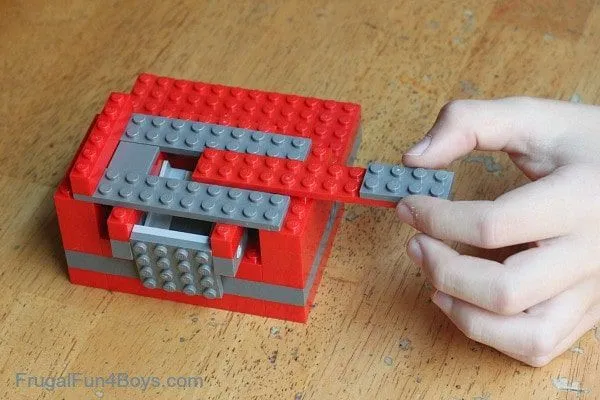
Image © Frugal Fun 4 Boys
Step nine: Use 2 X 6 and 2 X 3 pieces on your bridges and add a 1 X 6 piece which straddles your sliding arm. It should click on to the Lego either side but not on to the arm itself. Check you can slide your arm in and out smoothly before moving to the final step otherwise you may be disappointed with your final build.
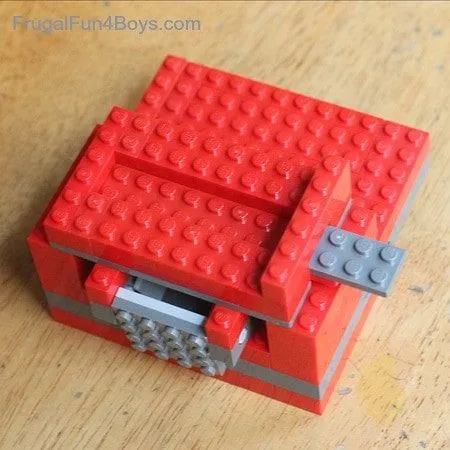
Image © Frugal Fun 4 Boys
Step ten: Once you're happy it works you can build up your sides. Add in window pieces if you want to be able to see the candy inside the dispenser. Remember the taller your sides the more sweets you can stash inside!
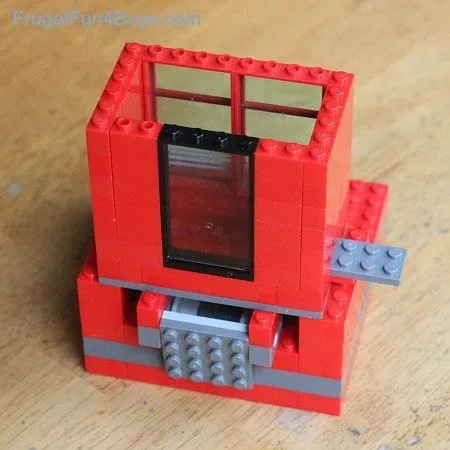
Image © Frugal Fun 4 Boys
Step eleven: Tip your sweets into your new candy dispenser and find a large piece that will cover the top of it. Now you're ready to operate it.
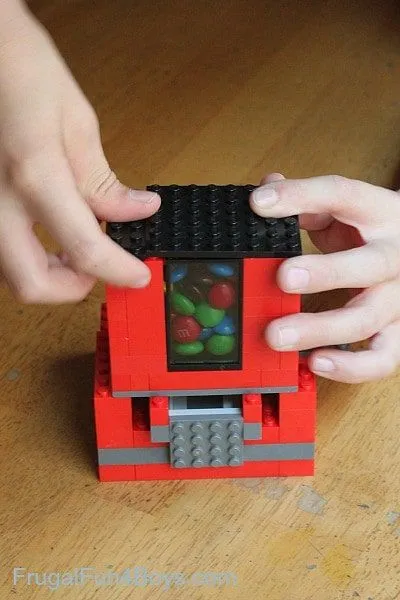
Image © Frugal Fun 4 Boys
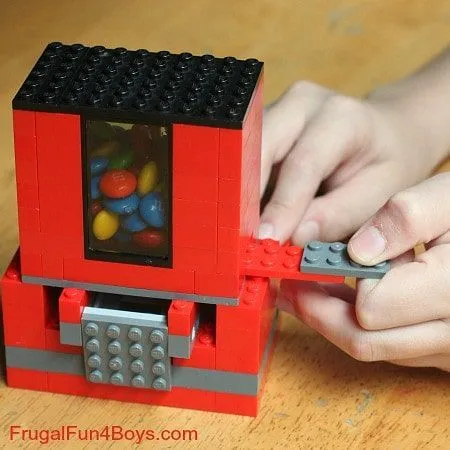
Image © Frugal Fun 4 Boys
Getting to your treats is simple. You can gently pull the arm out which will release the sweets into the chamber below. Then push the door so that the hinge allows it to swing up and your sweets should spill out in front of you. Of course, creative kids don't need to follow our instructions – let them loose and see what wonderful ideas they come up with all on their own. You may not like to keep your sweets inside this project for more than a day or two – though we're sure the excitement of using this means they won't last much longer than the build itself.
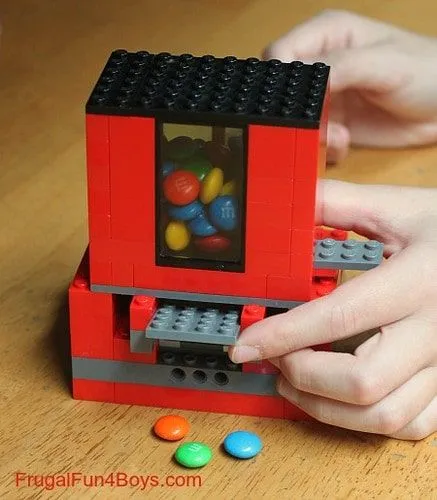
Image © Frugal Fun 4 Boys
Projects such as this give curious kids a brilliant insight into STEM activities and the chance to try out their own science, technology, engineering and maths skills. Young kids can reinforce number skills by searching for the right sized pieces and counting each bump (fact fans: these are referred to as studs) to make sure it will fit. Older kids can puzzle over the best way to build a functioning model and what happens if you change some of the pieces.
Read The Disclaimer
At Kidadl we pride ourselves on offering families original ideas to make the most of time spent together at home or out and about, wherever you are in the world. We strive to recommend the very best things that are suggested by our community and are things we would do ourselves - our aim is to be the trusted friend to parents.
We try our very best, but cannot guarantee perfection. We will always aim to give you accurate information at the date of publication - however, information does change, so it’s important you do your own research, double-check and make the decision that is right for your family.
Kidadl provides inspiration to entertain and educate your children. We recognise that not all activities and ideas are appropriate and suitable for all children and families or in all circumstances. Our recommended activities are based on age but these are a guide. We recommend that these ideas are used as inspiration, that ideas are undertaken with appropriate adult supervision, and that each adult uses their own discretion and knowledge of their children to consider the safety and suitability.
Kidadl cannot accept liability for the execution of these ideas, and parental supervision is advised at all times, as safety is paramount. Anyone using the information provided by Kidadl does so at their own risk and we can not accept liability if things go wrong.
Kidadl is independent and to make our service free to you the reader we are supported by advertising.
We hope you love our recommendations for products and services! What we suggest is selected independently by the Kidadl team. If you purchase using the buy now button we may earn a small commission. This does not influence our choices. Please note: prices are correct and items are available at the time the article was published.
Kidadl has a number of affiliate partners that we work with including Amazon. Please note that Kidadl is a participant in the Amazon Services LLC Associates Program, an affiliate advertising program designed to provide a means for sites to earn advertising fees by advertising and linking to amazon.
We also link to other websites, but are not responsible for their content.
Was this article helpful?


Browse Category


We’ll send you tons of inspiration to help you find a hidden gem in your local area or plan a big day out.


Check your inbox for your latest news from us. You have subscribed to:
Remember that you can always manage your preferences or unsubscribe through the link at the foot of each newsletter.