FOR AGES 5 YEARS TO 12 YEARS
Kids are hardwired to love anything arts and crafts inspired, and opting for a cup craft gives you a sturdy starting point.
A paper cup can be used as a great base for a whole range of fun crafts. As always, these crafts for kids are easy to make, fun to work on and will help develop both fine and gross motor skills in a fun way.
Even younger children can try easy paper cup crafts. Even by simply painting with a cup, or sticking things to it, they hone those motor skills. Paper cup craft activities usually don't require too many supplies either, with many cup crafts for kids only needing them to wave a paintbrush over the paper cup!
So, grab your crafts supplies (and a paper cup or two) and get set to try these paper cup crafts with the kids. Cheers!
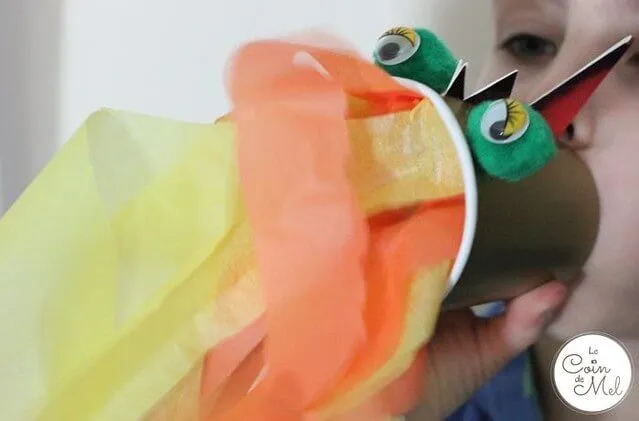
Image: © Le Coin de Mel
Try this great craft idea –kids can get this dragon to breathe fire by blowing into one end.
You Will Need:
Cup
Orange and red tissue paper
Pom-poms
Googly eyes
Card
Glue
Step One: Cut a hole out of your cup and make a 7cm slit along the length of the paper cup.
Step Two: Use card to make spikes with a flat edge that you can push through the slit leaving the spikes on the outside of the cup.
Step Three: Attach strips of coloured tissue paper to hand down from the cup. Next, stick two pom-poms either side of the spikes and attach googly eyes on top.
Are your kids Star-Wars obsessed? This fun tutorial will show you how to make a paper cup recycled Droid!
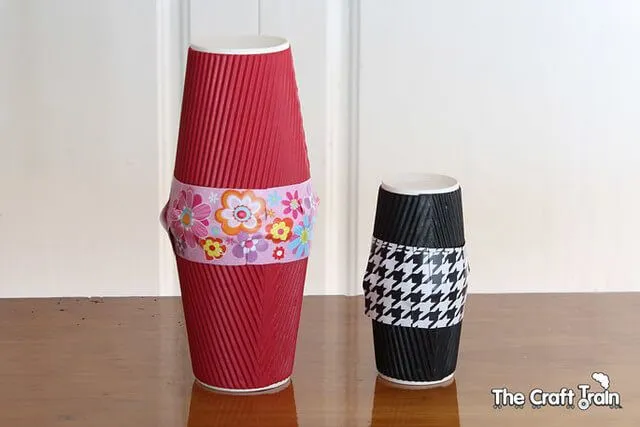
Image: © The Craft Train
You Will Need:
Paper cups
Elastic bands
Balloons
Tape
Paint/stickers
1.Stretch a balloon over the top of your paper cup so it's taut, cutting away excess. Use different sizes for different sounds, secure with elastic bands and decorate. Now you can enjoy your drum!
We love cup crafts for kids, but cups can also be a fun tool for little kids to paint with. Give them a dish of paint and get them to first put the top of the paper cup in the paint then press it on the paper - perfect circular bubbles!
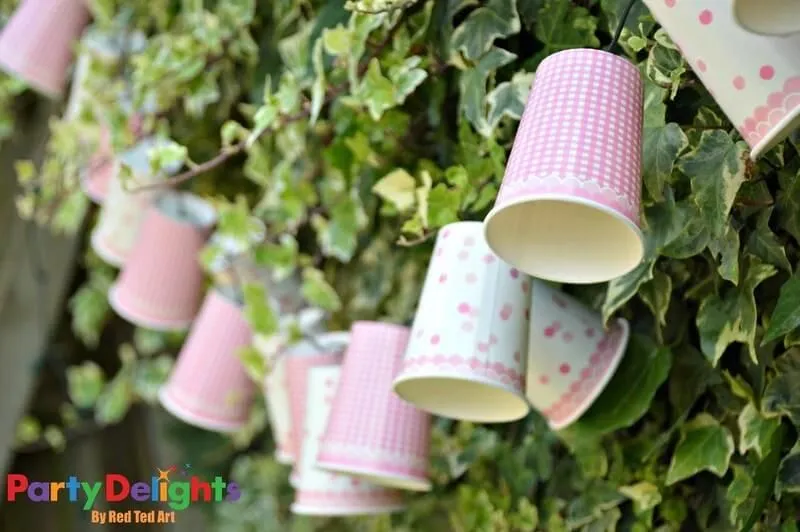
Image: © Red Ted Art
You Will Need:
Ribbon
Cups
Pencil
Decorations of your choice
Step One: Push your pencil through both sides of the paper cup near the base to make holes. Decorate your cups however you please.
Step Two: Thread through your ribbon to string your cups up in a line then hang in your garden or bedroom.
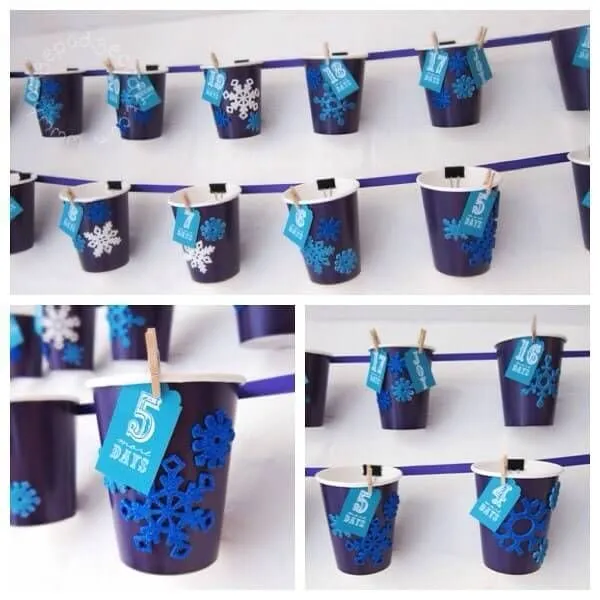
Image: © Hodge Podge Craft
You Will Need:
24 paper cups
24 Bulldog clips
24 mini pegs
5-6 metres of ribbon
Card
Stamps
Snowflake stickers
Step One: Decorate your cups with the stickers. Cut the card into 24 tags and stamp with numbers 1-24. Use mini pegs to attach to cup.
Step Two: Attach cups to the ribbon using the bulldog clips and fill each paper cup with mini gifts, or chocolate!
You can also use the above craft with paper cup treats to make party baskets for birthday celebrations! Just add guests' names to the tags instead of numbers.
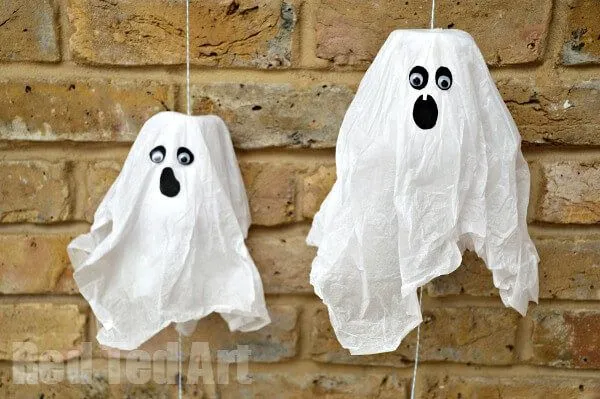
Image: © Red Ted Art
You Will Need:
One white paper cup
White tissue paper
String
Tape
Glue
Black pen
Treats
Step One: Fold tissue paper in half and fold down over the the cup so that it hangs down over the open end.
Step Two: Make a hole through the tissue paper and base of the cup and use string to create a hanging loop. Secure tightly with glue and tape.
Step Three: Fill the paper cup with treats. Tape tissue paper over the open end, and tape a piece of string hanging lower than the tissue paper covering the cup.
Step Four: Draw on eyes and a mouth. Hang up and have fun tugging the string.
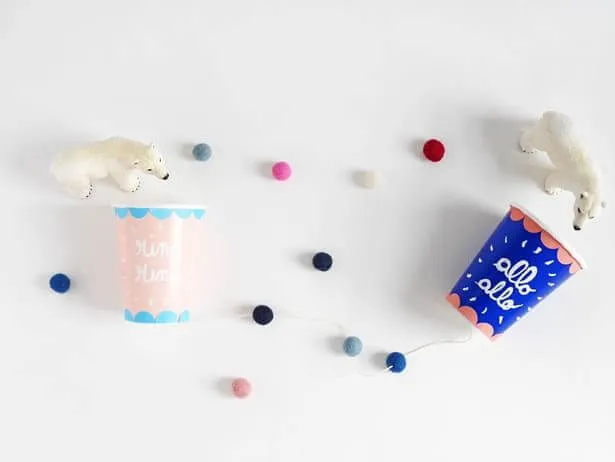
Image: © Hello Wonderful
Not all kids craft has to be complicated. Hours of fun can be had by kids with two paper cups and a piece of string. This paper cup craft is as easy as attaching string between each cup.
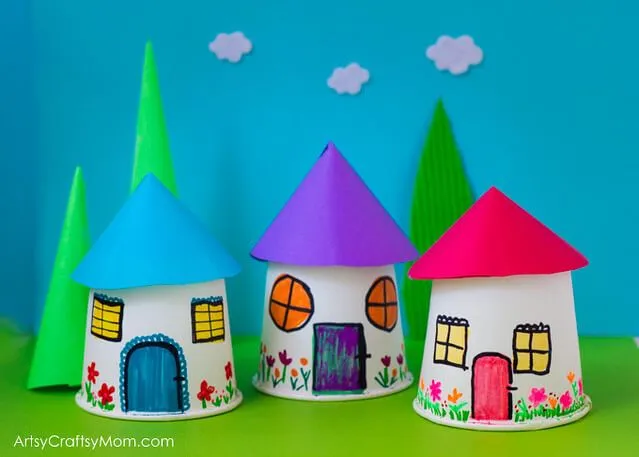
Image: © Artsy Craftsy Mom
You Need:
Cups
Sharpies
Coloured cardboard
Tape
Glue
Step One: Turn your cup upside down and give kids sharpies to draw on windows, a door and a garden of flowers.
Step Two: Cut out a circle from the card and roll into a cone, fixing in shape. Place on top of the house and fix with more tape.
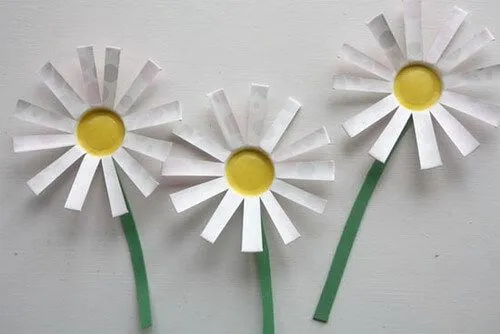
Image: © Factory Direct Craft
You Will Need:
White styrofoam cups
Yellow paint
Green card
Glue
Step One: Cut from the top of your cup down to the base to create the petals.
Step Two: Paint the base of the cup yellow. Attach to a stick of green card for the stem.
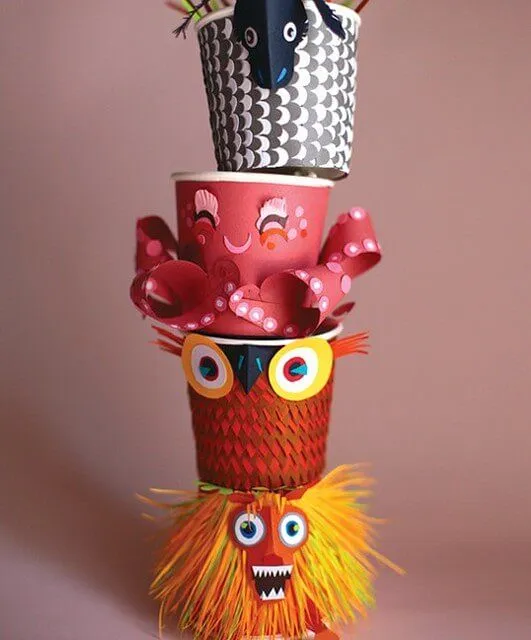
Image: © Gautam Dutta
You Will Need:
Cups
Coloured card
Glue
Tissue paper
Sheep: Cut out wave shapes in sheets of black and white card and attach to the cup. Use more card to make the face and fold in half before attaching to the top of the cup.
Octopus: Use a red cup. Cut out eight red cardboard tentacles and glue on small pink 'suckers'. Attach both ends to the cup twisting them around as you go. Finish by cutting out and gluing the face parts.
Owl: Cut out strips of small triangular shapes from red and brown card. Wrap around the cup alternating between the two colours. Cut out circles for eyes and add some orange card to the top outer corner. Use scissors to create snips out of this. Finish with a beak shape, folded in half and glued on.
This great craft is a lot of fun for little ones to make and as a cup craft for kids it's a rewarding one! Try this cup crafts for kids to make a paper cup trophy. Kids will have hours of fun with this paper cup craft.
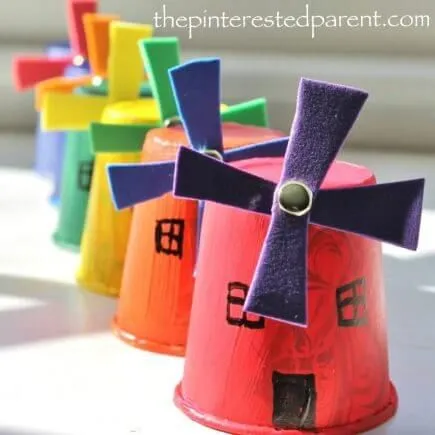
Image: © The Pinterested Parent
You Will Need:
Paper cups
Paint
Split pins
Card
Step One: Kids can paint the cups and leave to dry.
Step Two: Cut out sails from the card - you'll need two sets for each windmill.
Step Three: Attach to your cup in a cross shape using the split pin.
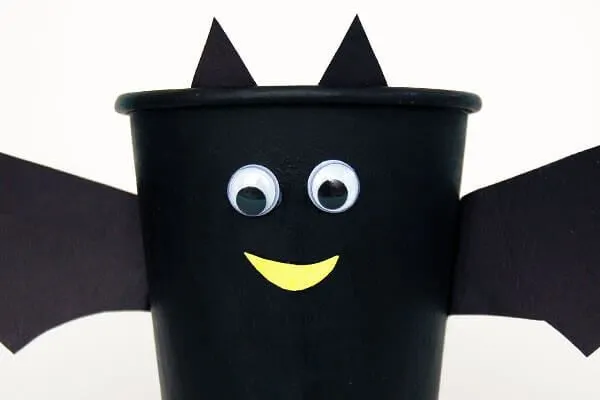
Image: © First Palette
You Will Need:
Cups
Cardboard
Glue
Paint
Foam sheets
Pom poms
Easter Basket: Paint your cup yellow. Use orange foam cut into shape to create a beak and feet. Attach with glue. Use yellow card to make a pair of wings and attach to either side of the cup. Finish by drawing on some eyes.
Trick or Treat Basket: Paint your cup black. Out of black cardboard cut out a pair of wings and small triangles for ears. Stick on with glue. Add some googley eyes and some yellow cardboard for a mouth.
Christmas Basket: Paint your cup brown. Use beige cardboard to cut out a pair of antlers and two ears. Attach antlers to the top and the ears to the side with tape or glue. Draw on eyes and a mouth and finish with a red pom pom nose.
Create your cup craft handles by punching a hole on each side and attaching twine. Fun cup crafts for kids with a sweet treat!
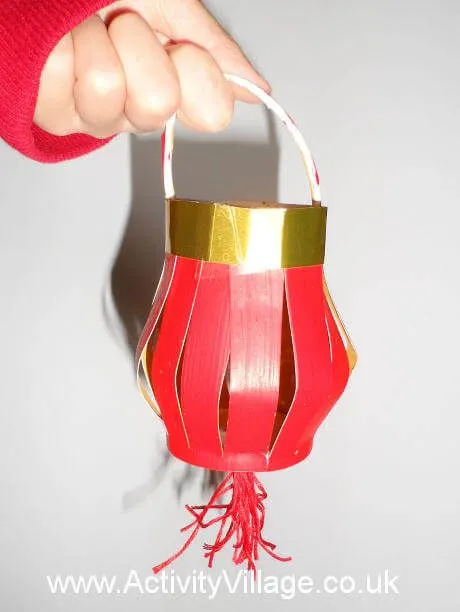
Image: © Activity Village
You Will Need:
Large cup
Paint
Gold card
Glue
Red wool
Step One: Paint the outside of your cup red, and the inside gold. When dry remove the rim to use as a handle.
Step Two: Cut strips into your cup down to the base. Fan out. Make a collar out of gold card and fix so that the strips are slightly splayed.
Step Three: Use red wool to make a tassel which can be poked through the base and fixed. Use the rim to make the handle and fix either side with tape.
This binocular craft tutorial is easy to make into a fun paper cup craft activity too. This is a really simple paper cup craft for budding twitchers. In fact, many crafts for kids can be transformed into fun cup crafts for kids. Just add a paper cup!
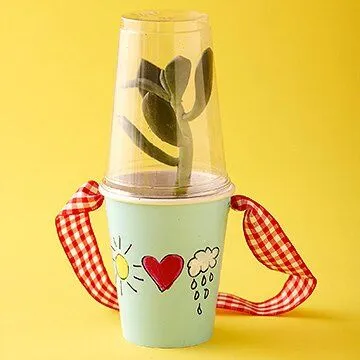
Image: © Parents.com
You Will Need:
One paper cup
One clear plastic cup
Soil
Small plant
Tape
Sharpies
Step One: Get kids to decorate the paper cup. Fill the paper cup with soil and pop a plant inside - make sure to firm the soil around it.
Step Two: Place the plastic cup on top and tape.
Read The Disclaimer
At Kidadl we pride ourselves on offering families original ideas to make the most of time spent together at home or out and about, wherever you are in the world. We strive to recommend the very best things that are suggested by our community and are things we would do ourselves - our aim is to be the trusted friend to parents.
We try our very best, but cannot guarantee perfection. We will always aim to give you accurate information at the date of publication - however, information does change, so it’s important you do your own research, double-check and make the decision that is right for your family.
Kidadl provides inspiration to entertain and educate your children. We recognise that not all activities and ideas are appropriate and suitable for all children and families or in all circumstances. Our recommended activities are based on age but these are a guide. We recommend that these ideas are used as inspiration, that ideas are undertaken with appropriate adult supervision, and that each adult uses their own discretion and knowledge of their children to consider the safety and suitability.
Kidadl cannot accept liability for the execution of these ideas, and parental supervision is advised at all times, as safety is paramount. Anyone using the information provided by Kidadl does so at their own risk and we can not accept liability if things go wrong.
Kidadl is independent and to make our service free to you the reader we are supported by advertising.
We hope you love our recommendations for products and services! What we suggest is selected independently by the Kidadl team. If you purchase using the buy now button we may earn a small commission. This does not influence our choices. Please note: prices are correct and items are available at the time the article was published.
Kidadl has a number of affiliate partners that we work with including Amazon. Please note that Kidadl is a participant in the Amazon Services LLC Associates Program, an affiliate advertising program designed to provide a means for sites to earn advertising fees by advertising and linking to amazon.
We also link to other websites, but are not responsible for their content.
Was this article helpful?

Browse Category


We’ll send you tons of inspiration to help you find a hidden gem in your local area or plan a big day out.



Check your inbox for your latest news from us. You have subscribed to:
Remember that you can always manage your preferences or unsubscribe through the link at the foot of each newsletter.