Arts & Crafts
Learn more
Reading & Writing
Learn more
Math & Logic
Learn more
Sports & Active
Learn more
Music & Dance
Learn more
Social & Community
Learn more
Mindful & Reflective
Learn more
Outdoor & Nature
Learn more
FOR AGES 7 YEARS TO 11 YEARS

The Vikings (KS2) is a fun history topic for kids to learn about, with a surprising amount of opportunities to create.
Chances are, they may be familiar with Vikings from cartoons, though the creative elements may remain a mystery. Here's where Kidadl comes in: find out about what kids will learn about the Norse people, their significance and their art.
The Vikings were a group of people who settled in Britain between 700AD and 1050AD. They came from an area known as Scandanavia, northwestern Europe. Scandanavia is where countries such as Sweden, Denmark and Norway are today. They arrived to invade Britain, leaving their homeland in pursuit of better farming land. Battle after battle took place against the Vikings before they eventually left, but their impact made in their time here was long-lasting. For example, many placenames in Britain today are Viking names, such as those ending in 'by', like Derby and those ending in 'thorpe', like Scunthorpe.
Also known as Norsemen, Vikings spoke a language called Norse which had its own alphabet consisting of runes. Think of runes as the letters that form our alphabet.
Teaching about Viking Britain begins in Year 3, lower Key Stage 2. As KS2 pupils develop their knowledge of British history, more understanding is gained about the struggle for territory over Britain. This is where Viking history fits in. KS2 kids will learn about:
-The invasion and raids of the Vikings in the eighth century.
-How rulers in England fought to resist the Vikings and retain their territory.
-Persistent efforts by the Vikings to claim the British Isles through further invasions.
-Laws and efforts to keep the peace between the British people and the Vikings.
-Prominent figures in Viking Britain who ruled and fought, such as Edward The Confessor.
In history lessons or art lessons, KS2 pupils may learn about Viking art, for its lovely patterns and seven different styles. Theses are:
-Oseberg (790AD to 850AD)
-Borre (850AD to 950AD)
-Jellinge (900AD to 980AD)
-Mammen (970AD to 1020AD)
-Ringerike (1000AD to 1070AD)
-Urnes (1050AD to 1150AD)
Nordic art, or Viking art, was created to make the everyday object look special. Viking art wasn't aimed at anyone in particular, it was just popular culture at the time for everything to be decorated. Anyone could show their skills on the objects they had at home.
From the helmet to the shield to the ear-scraper, nearly everything was adorned. The dragon was an important symbol among the Viking people, symbolising strength and bravery. Consequently, you're quite likely to see a dragon carved onto a Viking building, or on Viking jewellery.
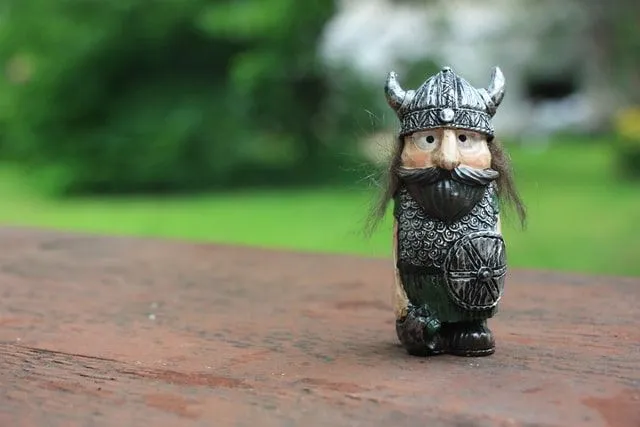
Image © Dzianis Sukhavarau
Owing to the practicality of Viking art, it's very easy for parents to help kids better understand this at home. With an abundance of Viking art activities to try, here are some Viking arts and crafts suggestions for kids to create and make use of:
-Create a mini shield out of Play Doh and carefully engrave it.
-Make your own Viking boat, get some small toy people and pretend to invade different parts of your home!
-Draw your own Viking dragon, with elongated swirling patterns.
A little research on Viking symbols and Norse patterns will go a long way when it comes to pattern inspiration. Have fun making!
Viking jewellery was intricate, well-made and of great value to the wearer. Both men and women adorned themselves with jewellery, developing the Viking style from the countries they had visited. These included necklaces, rings, bracelets and brooches. Some of the skills required were carving, engraving and hammering. Poorer Vikings often used bones from the animals they'd eaten, pewter (a grey mixture of metals) or bronze to make their jewellery. Those who were wealthier would use gold and silver.
Take a look at this fabulous tutorial to help kids develop their art skills and make their own Viking brooch!
You Will Need:
-Cardboard
-Yarn
-Aluminium foil
-PVA glue
-Acrylic paint
-Small paintbrush
-Plastic jewels
Method:
1) Cut out some cardboard (the size of a cookie) in a loose rectangular shape with rounded corners.
2) Take some yarn and glue some on top of the cardboard, in a swirling pattern. Cut off excess.
3) Use some more glue to cover the yarn and cardboard with foil (shiny side up).
4) Use your fingers to flatten smooth the foil around the yarn, so that it stands out under it.
5) Paint over the yarn outline in your favourite colour of acrylic paint.
6) Stick some jewels on, decorate and you're done!
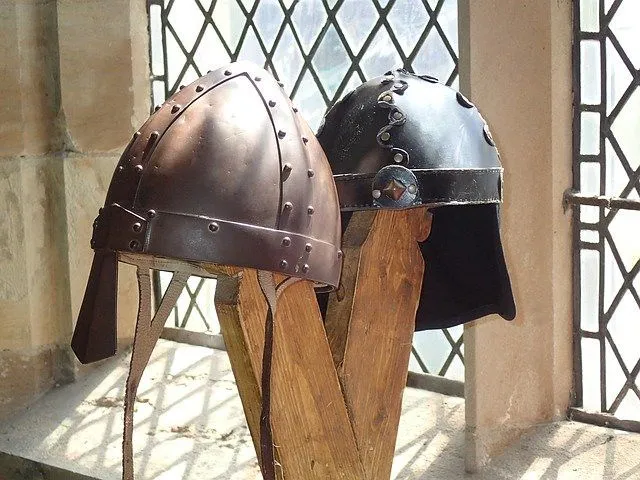
Image © Arthur ASCII
A popular Viking building in the Viking Age was the longhouse. It was long, with a tapered roof. Put your skills to the test and try building this square version using toothpicks!
You Will Need:
-Wooden toothpicks (the real Viking houses were made of wood too).
-Glue.
Method:
1) Take four toothpicks and set them down on a flat surface, in the shape of a square. Glue the corners together so that they overlap a little bit.
2) Take four more toothpicks and glue each one on top of a toothpick on the base layer.
3) Keep glueing toothpicks on top of one another, to increase the height of the longhouse.
4) Once at the desired height, take two toothpicks and glue them together in a 'v' shape, with the ends overlapping slightly. Then make another. The tip of each 'v' will form part of your roof.
5) Take each toothpick 'v', turn it upside down, and glue the ends to one side of the longhouse (so that the 'v' is upside-down at the top of the longhouse), forming the start of a roof at one end.
6) Take the other 'v' and glue it in the same way to the other end of the roof.
7) Pick up one toothpick, apply glue to both ends, and glue to the points to the inside of each 'v', connecting them together.
8) Glue the remaining toothpicks along the roof to the connecting toothpick, to build up the rest of the roof.
9) Paint and decorate your Viking longhouse!
Tip: For a more advanced longhouse model, why not try using lollipop sticks?

Temitope is a Fine Art student in London who loves to learn and loves to express herself creatively. A Private Tutor also, she enjoys the opportunity to share her knowledge with children from Primary School all the way up to Sixth Form and finds it incredibly rewarding. When she isn’t writing or tutoring, you could find her painting, editing photos, baking or building Lego with her nephew.
Read The Disclaimer
At Kidadl we pride ourselves on offering families original ideas to make the most of time spent together at home or out and about, wherever you are in the world. We strive to recommend the very best things that are suggested by our community and are things we would do ourselves - our aim is to be the trusted friend to parents.
We try our very best, but cannot guarantee perfection. We will always aim to give you accurate information at the date of publication - however, information does change, so it’s important you do your own research, double-check and make the decision that is right for your family.
Kidadl provides inspiration to entertain and educate your children. We recognise that not all activities and ideas are appropriate and suitable for all children and families or in all circumstances. Our recommended activities are based on age but these are a guide. We recommend that these ideas are used as inspiration, that ideas are undertaken with appropriate adult supervision, and that each adult uses their own discretion and knowledge of their children to consider the safety and suitability.
Kidadl cannot accept liability for the execution of these ideas, and parental supervision is advised at all times, as safety is paramount. Anyone using the information provided by Kidadl does so at their own risk and we can not accept liability if things go wrong.
Kidadl is independent and to make our service free to you the reader we are supported by advertising.
We hope you love our recommendations for products and services! What we suggest is selected independently by the Kidadl team. If you purchase using the buy now button we may earn a small commission. This does not influence our choices. Please note: prices are correct and items are available at the time the article was published.
Kidadl has a number of affiliate partners that we work with including Amazon. Please note that Kidadl is a participant in the Amazon Services LLC Associates Program, an affiliate advertising program designed to provide a means for sites to earn advertising fees by advertising and linking to amazon.
We also link to other websites, but are not responsible for their content.
Was this article helpful?
Get inspiration for education!
Subscribe for virtual tools, STEM-inspired play, creative tips and more


Browse Category
·
September 06, 2021

We’ll send you tons of inspiration to help you find a hidden gem in your local area or plan a big day out.


Check your inbox for your latest news from us. You have subscribed to:
Remember that you can always manage your preferences or unsubscribe through the link at the foot of each newsletter.


